Gluten Free Brioche - Bread a Celiacs Blessing or Trial?
 When you are in the process of giving up Wheat/Gluten bread, regular bread can become a bit like the Ring in The Lord of the Rings. It whispers enticing words like, "Go ahead, the consequences won't be that bad if you just eat it once." If you stay away from the bread it's power begins to fade. But, if you pick it up, smell it or ultimately taste it you are under it's spell. It tells you lies.
Celiacs (Gluten Intolerant Individuals) that have been gluten free for a long time learn about other wonderful things to eat and the bread begins to lose it's hold. But, since it once passed your lips sometimes their is a resurgence. Sometimes you get a bit too close to the Bakery or the bread isle in the grocery store. Or Heaven forbid a bread post on a blog.
I have watched my mother and daughter fight this battle. My mother is an "old" Celiac. She has been a Celiac since before anyone seemed to understand what her digestive system and immune systems problems were. She was a Celiac back when people scratched their heads thinking you must not have had enough attention as a child and are somehow trying to get some now with your stomach.
My daughter who is now out of High School has fought a battle resembling Frodo's battle with the ring, one of partial control with intermittent losses of it.
So on goes the search for really good Gluten Free bread. (The last statement is an oxymoron I know, but this recipe is pretty darn good.) This recipe actually tastes like something. Most Gluten Free bread is simply a "texture" not a taste. But, this one tastes good in addition to a nice texture. I found it in an unlikely place as I was reading about Gluten Artisan bread. I have adapted the method slightly with great results.
Gluten Free Brioche Recipe -
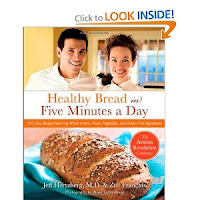
Adapted From “Healthy Bread in 5 Minutes a Day” by Zoe François and Jeff Hertzberg
Makes enough dough for three 1.5 pound loaves- 1 cup brown rice flour
- 1 cup tapioca starch (tapioca flour)
- 3 3/4 cups cornstarch
- 2 tablespoons granulated yeast
- 1 tablespoon kosher salt
- 2 tablespoons xanthan gum
- 2 1/2 cups milk
- 1 cup honey
- 4 large eggs
- 1 cup neutral flavor oil, such as Canola or vegetable oil
- 1 tablespoon pure vanilla extract
- Egg wash (1 beaten egg with 1 tablespoon water) for brushing on loaf
- Raw sugar for sprinkling on top crust
- Whisk together the brown rice flour, tapioca starch, cornstarch, yeast, salt and xanthan gum in a 5-quart bowl, or a lidded (not airtight) food container.
- Combine the liquid ingredients and gradually mix them into the dry ingredients using one of the following: a spoon, a 14-cup food processor (with dough attachment) or a stand mixer with a paddle attachment. Mix just until there are no dry bits of flour. You might need to use wet hands to get the last bits of flour to incorporate if you are not using a machine.
- Cover (not airtight!) and allow the dough to rest at room temperature for 2 hours.
- The dough can be used now, after this initial rise, or it can be refrigerated for up to 5 days – do not store in an airtight container!
- On baking day, grease a 8.5″x4.5″ nonstick loaf pan. Use wet hands to break a 1.5 pound piece of refrigerated dough and shape it into a ball. Note: the dough isn’t stretched because there’s no gluten in it – just gently press it into shape. You might need to wet your hands to keep the dough from sticking and to create a smooth surface. Do not make the dough soggy.
- Elongate the dough into an oval and put it in the loaf pan, smoothing the surface with your fingers. Cover loosely and allow to rest for 90 minutes (40 minutes if you are using fresh, unrefrigerated dough).
- Preheat the oven to 350°F.
- Just before putting it in the oven, use a pastry brush to gently paint the top of the loaf with egg wash and sprinkle raw sugar.
- Bake in the center of the oven for about 40-45 minutes. The loaf is done once it is caramel brown and firm to the touch. Smaller or larger loaves will require adjustments in resting and baking times.
- Remove brioche from the pan and allow it to cool on a rack before slicing and eating. If it will not come out of the pan, let it sit for five minutes to allow the loaf time to steam itself loose from the pan. To firm up the outer crust again, place it back in the oven for three minutes to dry out the damp sides.


Comments
Post a Comment